Monday, June 30, 2014

Tea - Stained American Flag Buntings For July Fourth!

Over the weekend, I added some much-needed seasonal decor to my front yard. My porch railing is visible from the street and is really one of the first things you notice when you see my home. This quick (5 minute), easy (hammer and 12 nails), and colorful update made a huge difference!


This was my front porch railing - colorful, fun, and plant-y. But there's not a lot of oomph.


So, I added tea-stained flag buntings that I actually bought 4 months ago when I saw a great sale online. I got mine here, but they are no longer available. Note: there are a lot of different price points for items like this, but I paid about $5 per piece.


It was so easy; I just grabbed my handy-dandy hammer (that Grandpa gave me for Christmas almost 20 years ago) and added some nails to the railing. My buntings came with grommets already sewn in.


I think it makes a big difference in how my house looks, especially as you're coming up the walk (this view below). It's more inviting and summery. Now, I just need to add the chairs back to the porch (they're in the backyard for a party). 


What are your easy 4th of July decorating ideas?

Wednesday, June 18, 2014

Burlap Message Board For The Entryway

My entryway is sad. It wants art and color and LIFE, but since the artwork is still unpacked, it's sorely lacking. Luckily, my sister made me this very cool key holder, as a housewarming present. 


But it looked a little empty, all alone on the wall. 


I found this burlap message board at Home Goods for less than $20 and I think it's just what the space needed.


Now, I have a place for tickets to upcoming shows, workout reminders, and coupons I want to have handy, but don't want to carry around. 


Like the Getty Villa :)


The frame is a distressed, espresso color, and it pairs really nicely with my dark floors and the border of the key holder. 


Here's the new look!


I still need to add more (this is waaaaay too empty for my tastes), but it's a start! It makes me happy as soon as I walk in the door. :)

Tuesday, June 17, 2014

Using Succulents With Flea Market Finds

On Father's Day, my parents, sister, and I went to the Long Beach Antique Market for a morning of treasure-hunting. I found lots of fun items that I'll be posting about in the next few days, but I wanted to share with you two great decorating ideas I saw there.
This is so simple, and yet so pretty. An old muffin tin (easily found at thrift stores or garage sales), some pretty succulents and a few votives round out the look. You can fill the while thing, or leave a few blank. I also think it would be fun to try other fillers - maybe sea glassJapanese fishing floats, or even sea urchins

This is another simple idea - succulents in a chipped enamelware basin. I'm a fan of enamelware anyway, but add some succulents and it's so fresh. I like that they're not planted, but still in their little store pots; it looks very casual and fun. Here are two options from Etsy: this one is $17, this one is $10. 

If you haven't been to the Long Beach Antique Market, you should! It's HUGE and has over 800 sellers. This picture only shows a portion of the market...

{photo via Food &Wine - who called it one of America's Best Flea Markets}

Do you enjoy antique markets? Have you found any good decorating ideas from displays before?

Friday, June 13, 2014

What To Do With An Empty Corner In The Bedroom

I need your help, friends! What should I do with this corner of my bedroom?

{I know you're jealous of my super-awesome drafting software, huh?}

Here are some real photos of the layout.


{entering from the hallway}

{the view of the bed. i'm sorry, i couldn't be bothered to make my bed when the rest of the room is still a mess. also, let's ignore the plastic on my box spring. }

{the closet doors are on the left, opposite the bed.}


So, when you enter my bedroom, the dresser is on the wall to the right of you. The wall to the left is taken up completely by closet doors. The bed pretty much takes up the rest of the space. So, there's this empty spot in the corner and I kind of hate it.


{the same corner, but in different light}

I don't really want to block the window, but I think SOMETHING needs to go there! I originally had this bookcase in there, but it looked way too crowded (sorry I don't have a picture of it IN the bedroom), and it blocked the window.

{this bookcase is now in the living room}

Right now, I have a cheapo floor mirror propped up in this corner (a future project - I'd like to add molding and put it behind the door).


I'd love to get the cable box off the dresser, so maybe a little console table with a mirror over it? Maybe a vanity table? The cats also like to sit in front of the window, so whatever is there needs to have a cat-friendly surface, otherwise they'll just knock everything over.

Note: the space between the window and the dresser is EXACTLY 36 inches, so I'd need something slightly smaller. That dresser weighs 321681 pounds and is immovable.

  I'm stuck! Help me!

Thursday, May 22, 2014

Urchin Friends In The Bathroom

I picked up some green sea urchins on Ebay a while back, because they were a great deal, a great shade of green, and I was sure I could figure out a way to use them. And here's where I put them!


Right above the bathroom mirror in the guest bath.


It looks great at night, when the walls look even greener.


And the best part is...the cats can't reach them!

Wednesday, May 21, 2014

Using Podocarpus (Fern Pine) As A Privacy Screen Part 2

You may recall my post about the firefighters, I mean, the plants I chose for the backyard. Well, the podocarpus plants were delivered and planted today!

Here is the backyard way back when.


Here the trees are in pots, being lined up and spaced. 


And here they are all in! I can't wait to see them fill out and get all fluffy.


Now, to work on that grass and to set up my patio furniture! 

Any ideas on fun plants I can put in between the trees? I'm thinking something floral and sweet-smelling - maybe gardenias?

Tuesday, May 20, 2014

My Ingenious Mailbox Solution!

On Pinterest, TV, and in magazines, I see houses with the cutest mailboxes. Tall posts at the end of a lawn, beachy lighthouse shaped beauties at the curve of a driveway, even those adorable envelope shaped mail pockets from Pottery Barn - they're all so awesome!

But in the real world, where I live, it's a little disconcerting to have your mail out where anyone can look through it (or take it). Identity theft is real, peeps! And it can take YEARS to climb out from that mess.

So what are my options? A mail slot in the door is one - but then that leads to security issues. Not just the break-in fear, either. I have fears you didn't even think about. Like what if someone drops something stinky, poisonous, or dangerous in the slot? What if pets or children eat it? Nope, no mail slot in the door.  

How about a locking mailbox, you say? Yes, that could be an option. But guys, I've lived in apartments and condos for almost ten years. Which means I've had to unlock my mailbox and get my mail out for a long time. Which wasn't terrible, but it wasn't optimal, either. And it means I'd let the mail pile up for days before I'd drag my lazy self to get it. Is it too much to ask for a secure mailbox that is easy to collect from?

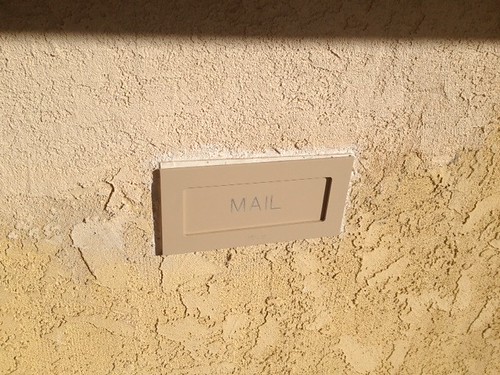
Nope. So, here's my ingenious solution. Mailboxes.com sells these awesome mail drops that mount right into the wall of your house. They're large enough for packages, they come in multiple colors, and they have an adjustable flap stop so that you can change the opening size. 

photo 3 (2)
This picture is pre-paint job, so please don't hate on my ombre yellow wall. 

So, now you have a mail drop, but what happens to your mail on the inside? It drops. To the floor? To a basket? To one of these hanging folders? If it's not going into a secure place, you still have a situation where someone could drop undesirable or dangerous items right into your house. And if you choose a hanging folder, it's not the most attractive look for the other side of the door, is it?

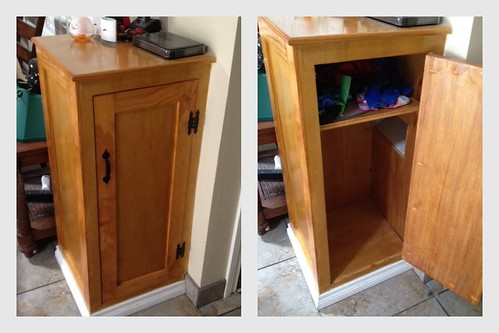
My ingenious solution was inspired by my parents. In my their house, they had a custom cabinet built in for the mail.

Desktop25

In my house, that cabinet would have directly impacted my kitchen design and layout. So, I just incorporated it.

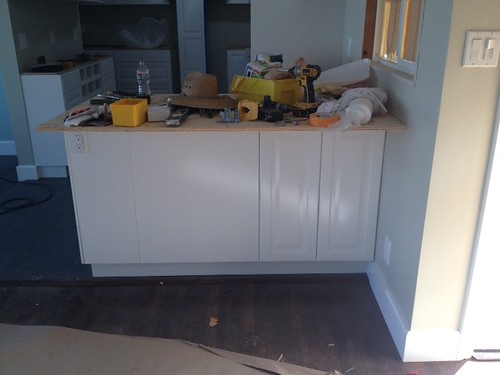
Instead of using a corner cabinet, I had a regular 24x24 inch cabinet installed at the end of my peninsula and had the mail slot lined up with it. 

This is what it looks like to the unsuspecting eye - looks like island storage.

photo 1 (3)
This is during construction, so please excuse the mess. 

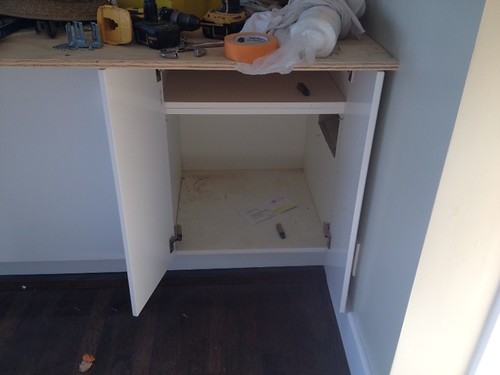
And this is what it looks like open.

photo 2 (5)

You can see the slot and even a letter that was delivered. I may add a basket in there to corral the mail, but for now, I'm just so happy having it hidden, safe, and secure.

I had them add the top shelf, to better utilize the space. I think it would be a good place to keep dog leashes, though I can't think of what else I would keep there. Any ideas?

Monday, May 19, 2014

Full Bathroom - Before and After!

I was on vacation (in Florida!) for the past week, so I didn't write a darn thing :)
And while I was gone, the house was pretty much completed! I'll be moving in this week!

So, leading up to that, I want to share the before and after transformations with you.
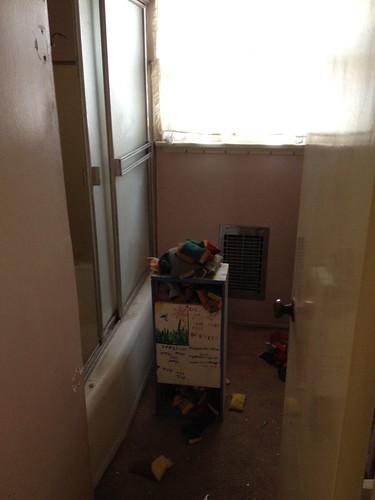
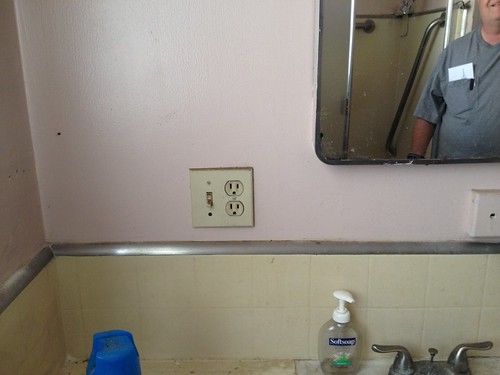
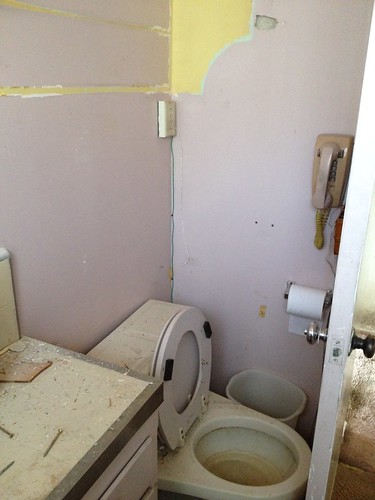
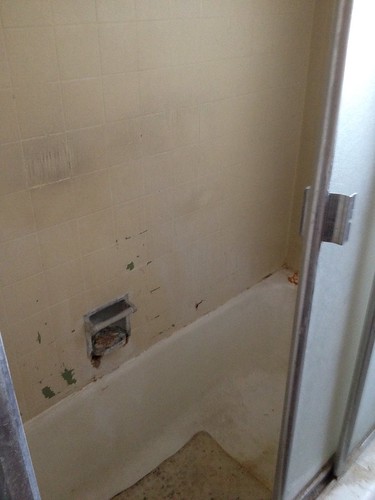
This full bath was in the original layout of the house, but boy did it need a makeover.

Here is the hall bath BEFORE:

photo 2 (14)
This was the view looking into the bathroom from the hallway. Yes, those walls are pink.

photo 1 (7)
Pink walls, yellow backsplash with chrome edging and a nasty medicine cabinet. That's my dad in the mirror.

photo 1 (17)
The toilet. And telephone.

photo 3 (17)

photo 1 (15)
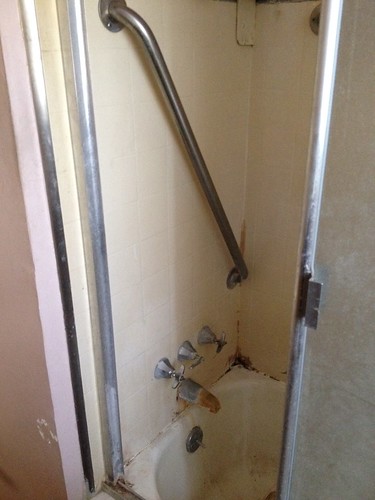
The yellow tiled bathtub - all original everything.

photo 4 (11)
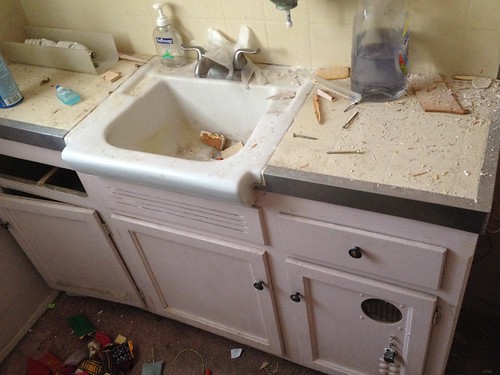
The vanity was a nice size, but ancient, broken...and pink.

photo 2 (3)
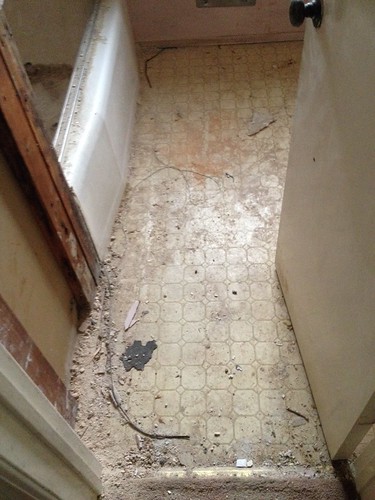
The linoleum floor was yellow.

Now onto the DURING photos:
photo 1 (3)
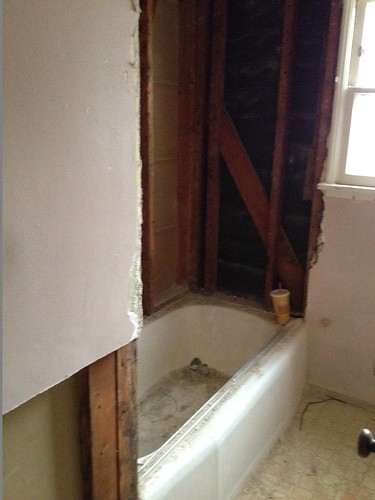
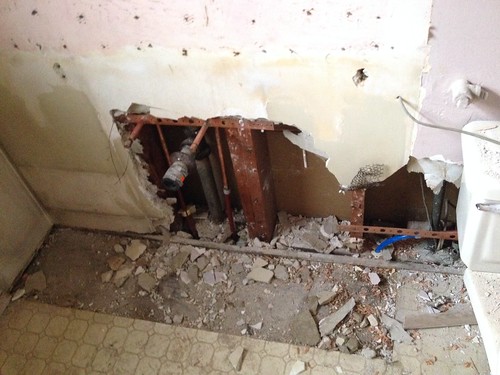
The walls come off so the new shower tile can go up!

photo 3 (3)
The vanity comes out so we can add copper piping and redo the electrical.

photo 3 (46)
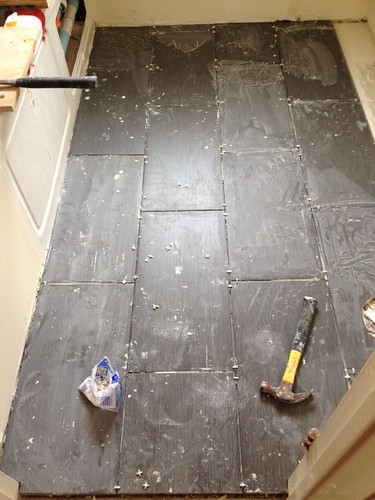
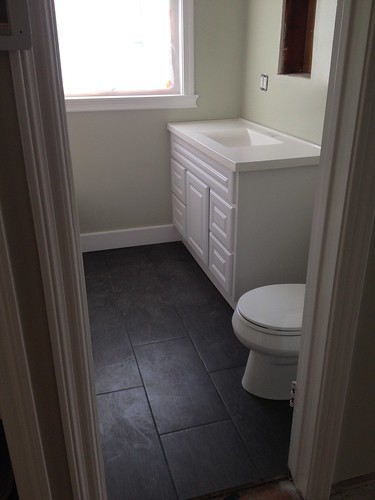
The new flooring goes in! This gray, rectangular tile runs through both bathrooms and the kitchen.

photo 5 (3)
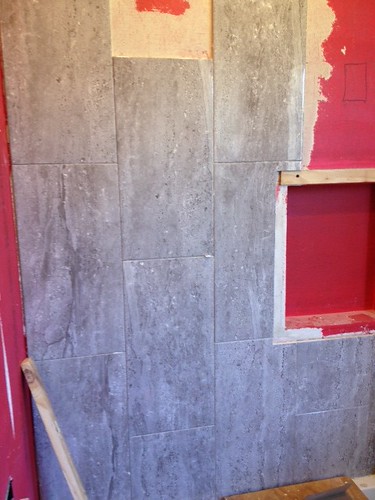
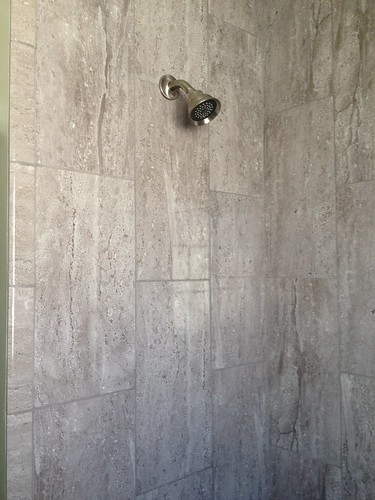
The gray, rectangular tile goes up on the shower walls.

photo 4 (45)
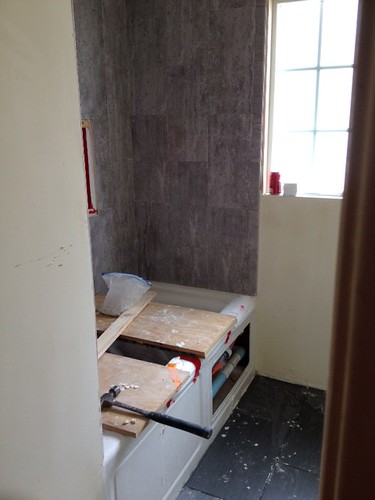
We laid the tile vertically to create a feeling of more height in the 8 foot room. You can also see the new whirlpool jet tub in this picture.

photo 4 (42)
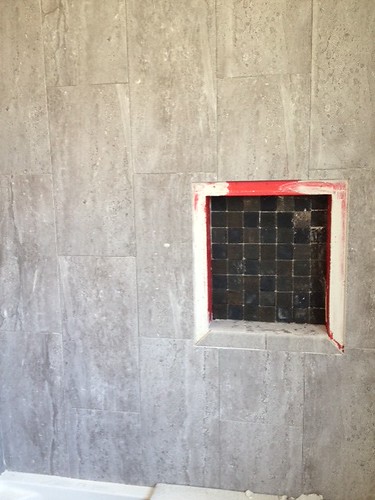
The shower niche has contrasting tile work.

photo 2 (25)
The new toilet and vanity go in!

And finally, here are the AFTER photos:

photo 1
The finishings are in!

photo 4 (14)
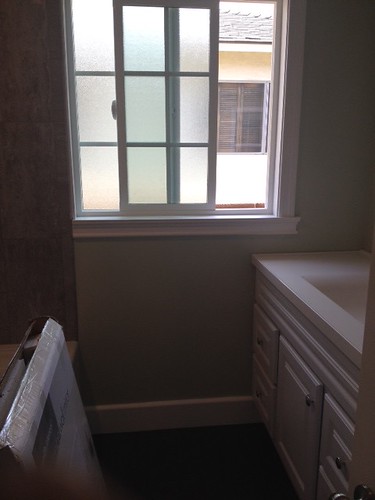
The new window is frosted and spiderfree. Definitely important features. 

photo 1 (4)
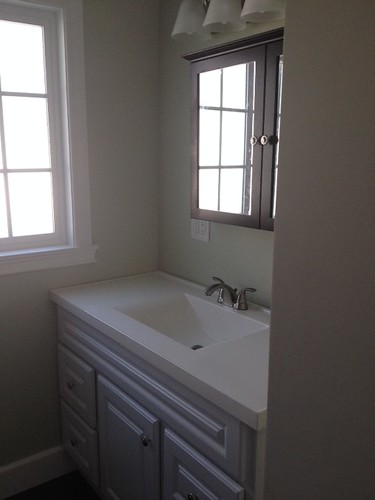
The new vanity, along with the new faucet, medicine cabinet and lighting. I love how the 48" vanity has a molded sink, so there are no seams to clean!

photo 2
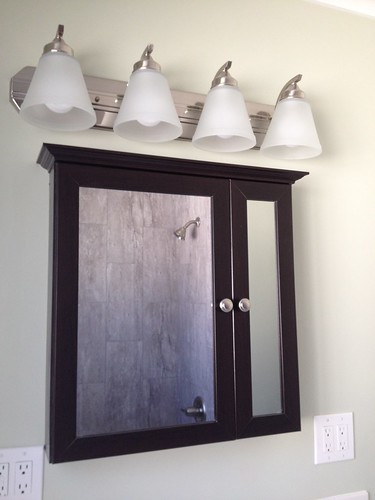
Here is a better view of the medicine cabinet. I chose an espresso color to add some contrast and character to the white cabinet. I also like how the dark wood pulls in the dark tones from the shower niche. Isn't the asymmetrical opening on the cabinet awesome? It was the first one I noticed in the store.

There will actually be more photos (the AFTER AFTER photos), once it's decorated.